What's new in your HR software? (2026)
Find out about the changes we have made.
You can also check our known issues, fixes, and what's coming soon.
2024 | 2025 | Jan 2026 | Feb 2026| Mar 2026 | Apr 2026| May 2026| June 2026 | July 2026 | Aug 2026 | Sep 2026 | Oct 2026 | Nov 2026 | Dec 2026
Introduction
These release notes describe new features, enhancements, and fixes since the last release. All changes come from customer feedback and suggestions.
31 March 2026
Product enhancements - core HR
Filter the Dashboard
-
On the Dashboard, within the Actions drop-down, we have added an Employee Selector option, allowing you to filter the results shown in the Dashboard to only the employees included in the selector
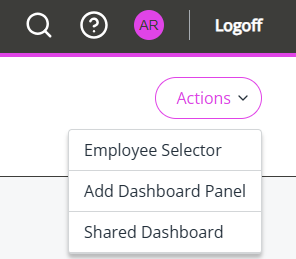
Find out more about using the View the Dashboard
Documents
-
Now, when you create a document in an employee's My Details > Documents and you select the Read & Accept checkbox on the form, an Acceptance Type drop-down displays. This matches with creating a document in System Tools, and allows you to set how an employee needs to accept the document
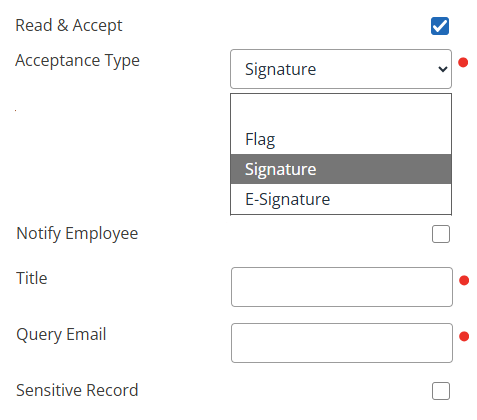
Learn more about creating documents with Read & Accept set.
New Starter Checklist
-
Following the new Student Loan Plan Type 5 coming into effect from April 2026, we have updated My Details > Payroll > New Starter Checklist, Student Loan Plan
Plan 5 applies to employees who applied to Student Finance England and started courses from August 2023 onwards.
Directories
-
In Directories, when you have more tabs than can fit on one screen, you can access the remaining tabs by selecting the three-line menu icon

P60s
-
We have updated P60s for the 2025/2026 tax year
Star Payroll
-
From April 2026, employees who qualify for Statutory Parental Bereavement Pay Northern Ireland will have a new SPBP (NIRE) Paid column on their payslips
Org Chart Reports
- The following reports have been removed from the Org Chart:
- Organisational Head Tree
- People Tree
- Organisational Groups
3 March 2026
Product enhancements - core HR
Staffology Payroll integration
-
We have redesigned the integration screens to make connecting your HR and Payroll companies straightforward. Step by step, the new layout guides you through setup and updates, making the process smoother than before
Find out how to integrate your HR and Payroll companies:
Staffology Payroll screen updates
-
We have updated the Payroll screen to display only the Company Integrations and Tax Codes sections, allowing you to quickly locate and manage your payroll integrations
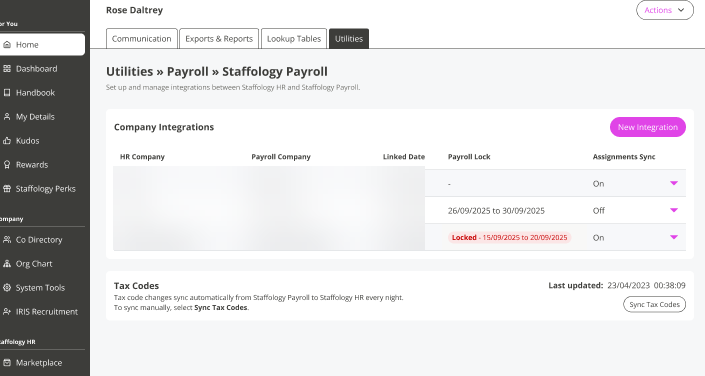
Company Integrations table
-
Selecting a company from the table now opens a new screen showing the integration between your chosen HR and Payroll companies
From this screen, you can:
-
Schedule a Payroll Lock
-
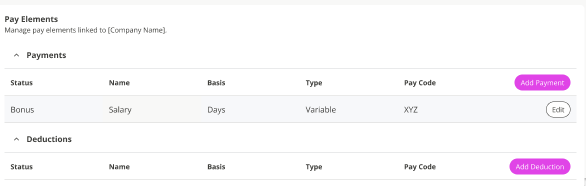
Create and manage payments and deductions
-
Remove the integration between your HR and payroll companies
-
Integration Log
-
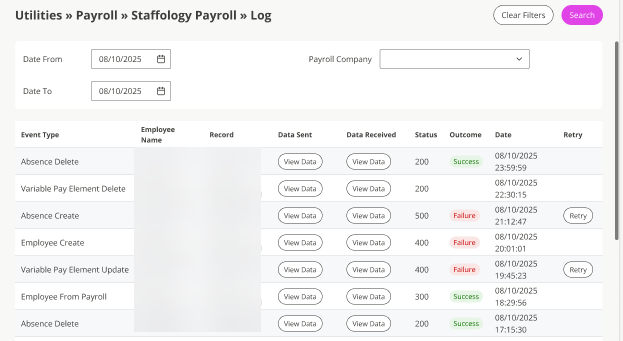
In System Tools > Utilities > Payroll> Staffology Payroll > Actions > Integration Log, we have updated the table labels to make them clearer.
Updates include:
-
Renamed the Request column label to Data Sent
-
Renamed the Response column label to Data Received
-
Added an Outcome column showing Success, Failure, or a blank status depending on the status code
-
Added a Retry column
-
Manage your Staffology Payroll integrations
Charts
-
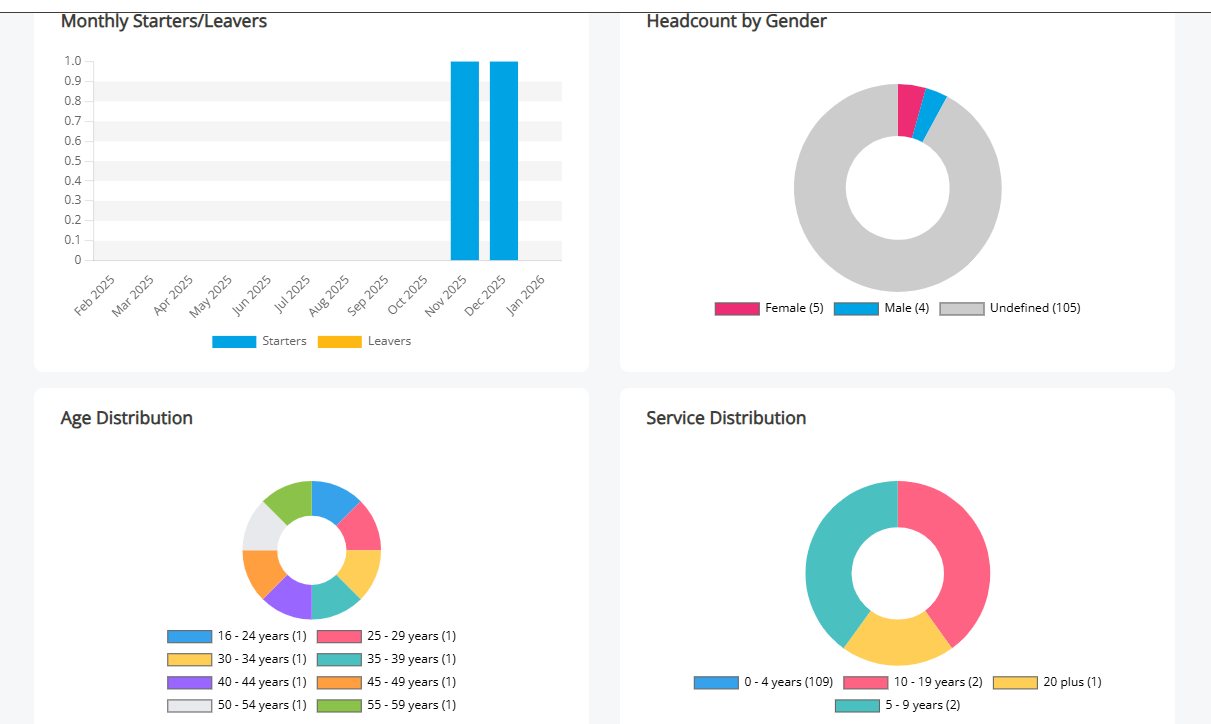
We have replaced many charts across the system to improve usability and give them a modern look
Areas with updated charts include:
-
System Tools > Utilities >Company >Sign-Management > Login Track
-
Dashboards
-
February 2026
There is no release this month.
Product enhancements - core HR
Staffology Payroll integration
-
We have redesigned the integration screens to make connecting your HR and Payroll companies straightforward. Step by step, the new layout guides you through setup and updates, making the process smoother than before
Find out how to integrate your HR and Payroll companies:
Staffology Payroll screen updates
-
We have updated the Payroll screen to display only the Company Integrations and Tax Codes sections, allowing you to quickly locate and manage your payroll integrations
Company Integrations table
-
Selecting a company from the table now opens a new screen showing the integration between your chosen HR and Payroll companies
From this screen, you can:
-
Schedule a Payroll Lock
-
Create and manage payments and deductions
-
Remove the integration between your HR and payroll companies
-
Integration Log
-
In System Tools > Utilities > Payroll> Staffology Payroll > Actions > Integration Log, we have updated the table labels to make them clearer.
Updates include:
-
Renamed the Request column label to Data Sent
-
Renamed the Response column label to Data Received
-
Added an Outcome column showing Success, Failure, or a blank status depending on the status code
-
Added a Retry column
-
Manage your Staffology Payroll integrations
Charts
-
We have replaced manyall charts across the system to improve usability and make the more moderngive them a modern look.
Areas with updated charts include:
-
System Tools > Utilities >Company >Sign-Management > Login Track
-
Dashboards
-
January 2026
Product enhancements - core HR
Feature only available for Ultimate and Professional packages.
Disciplinary tab and form
-
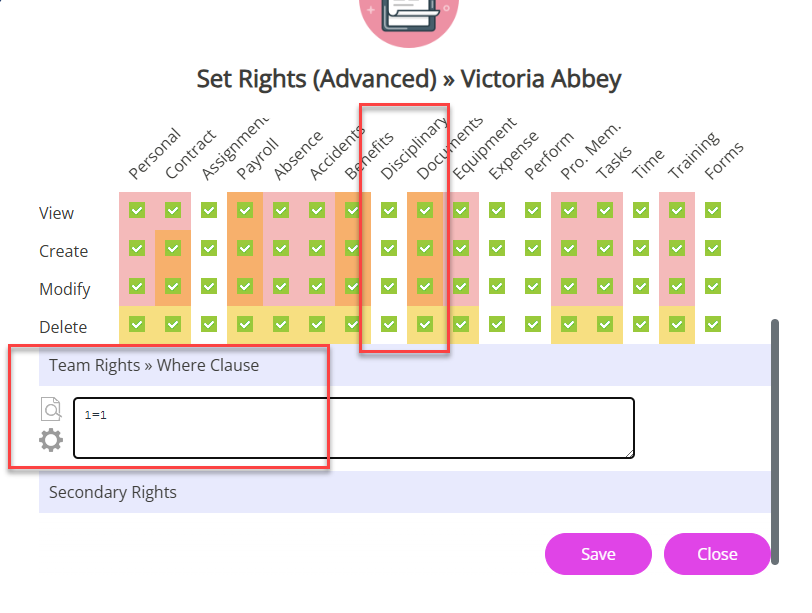
You can now record and manage disciplinary actions for employees using the new Disciplinary form. The system stores these records in a new Disciplinary tab, which is only visible to users with Set Rights Set Rights are the system permissions you allocate to employees to control the information available to a user about other employees. permissions.
The Disciplinary tab is hidden by default. You must activate it using Set Rights permissions. Access is usually given to HR only, as disciplinary information is sensitive. Line managers do not usually require access.
For guidance on creating or updating the item lists in the disciplinary form, use Create a disciplinary record for an employee or Update Disciplinary form list items.
Include Similar Results checkbox
-
We added a new search checkbox in Directories called Include Similar Results. Selecting this checkbox returns more results, including partial matches and results for search terms containing a spelling mistake
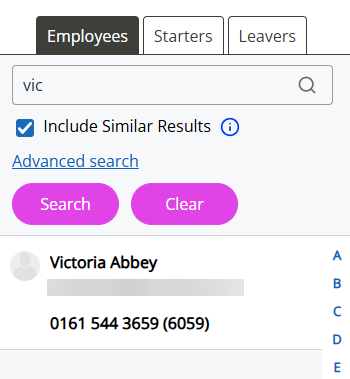
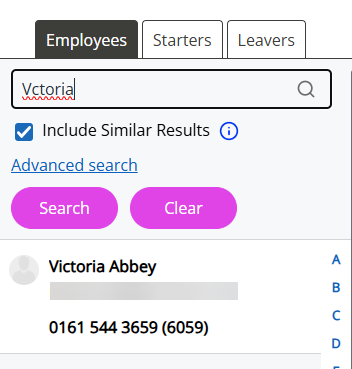
For more information, open Search for an employee in Directories
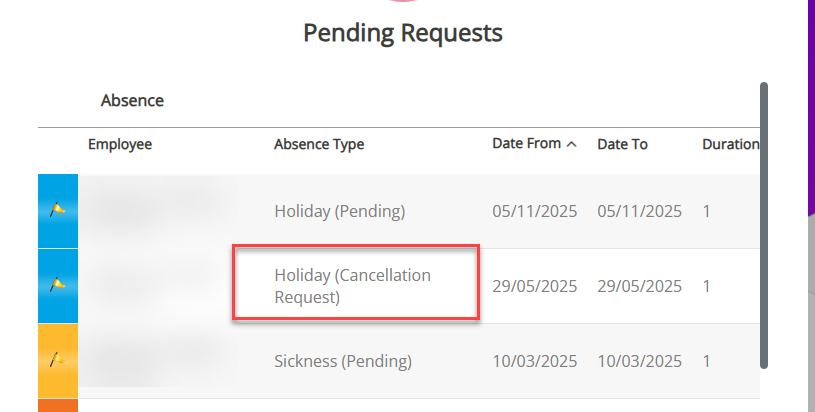
Absence cancellation requests
-
We have updated the email wording line managers receive when an employee requests to cancel their approved absence When an employee or worker is absent from work. This can be for a variety of reasons.
-
If the absence cancellation request is approved, the absence shows as cancelled in the employee's record within My Detail > Absence > Status list
-
Absence requests pending cancellation also show on the line manager's Home screen > Notifications > Pending Requests
Original your HR software mobile app
-
The original your HR software mobile app is now retired and will no longer work on your mobile.
Download our new redesigned mobile app, Staffology HR by IRIS:
Links are also available on the your HR software home screen.

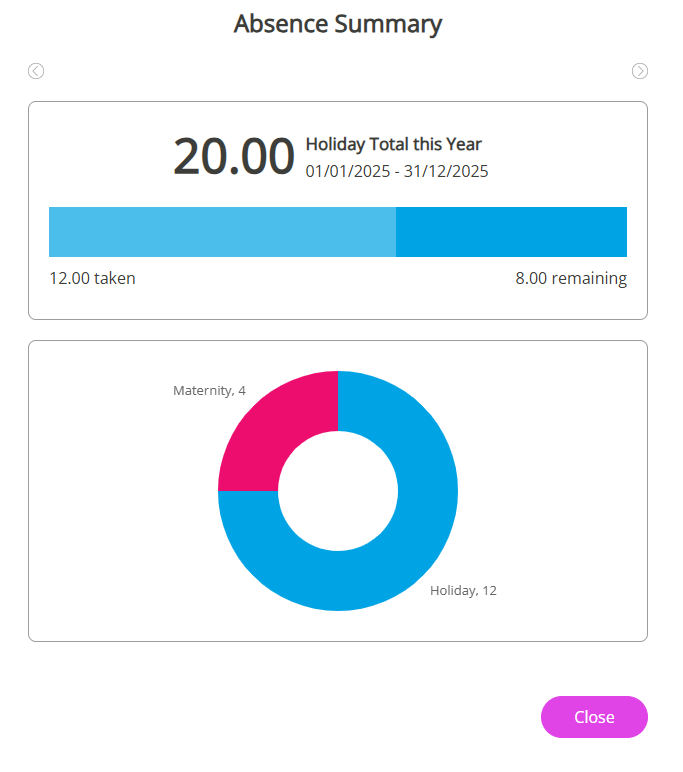
Absence Summary
-
We updated the charts on the Home screen and in My Details > Absence > Actions > My Summary > Absence Summary. The charts now have a modern look and meet accessibility standards